
RimWorld: how to feed animals and get through winter
Fix starving animals in RimWorld: check diets, pens, food access and storage, then plan hay or kibble supplies for winter and a growing herd.

To feed animals in RimWorld, you need food that matches their diet at a place they can reach. If your animals are starving beside a full food store, start with the animal. Check what it can eat, then whether it can reach that food. Growing another field won't fix hay sitting behind a door your livestock can't cross.
Once access works, plan for the days when grazing won't. Your winter supply needs to cover the animals you'll actually keep, including the young you expect to raise, until outdoor food is usable again.
The basic feeding setup does not require DLC. Check the individual diet of special DLC animals and modded creatures before adding them to a shared feeding setup.
For help deciding which animals earn their keep, use the RimWorld animals guide and tier list. Here, the job is getting food from your stores into the animals you already have.
Start with the animal that's going hungry
Select an affected animal and look at its food need, health and diet. A healthy animal that can move normally should feed itself when suitable food is available. A downed animal needs care; putting more food somewhere on the map doesn't establish that it can eat it.
Work through this order:
- Does it eat the food you've stored? Check the species rather than assuming every animal eats hay.
- Is it a pen animal or an animal assigned to an allowed area? That decides which access settings matter.
- Is suitable food physically at an accessible feeding spot? An empty stockpile outline supplies nothing.
- Does the spot stay supplied? If it empties again, follow the hauling or production problem.
After a change, watch the affected animal. You want to see it eat and its food need recover. A higher colony-wide food count isn't confirmation.
| What you can see | Check next | What to change |
|---|---|---|
| Hay is in the barn, livestock remain hungry outside | The opening between barn and pen | Provide access through an animal flap while keeping the outer pen enclosed |
| A pet ignores a hay pile | Its diet and assigned area | Offer compatible food at a spot included in that area |
| The feeding stockpile is empty | Filters, priority, free space and hauling | Correct the delivery setup, then confirm food arrives |
| Animals eat once, then the problem returns | Replenishment and herd growth | Restore supply and recalculate demand |
| Summer grazing worked, winter grazing doesn't | Current vegetation and stored feed | Start supplying stored food; don't rely on the summer estimate |
| One animal is downed while others eat | Its health and care | Address the animal's condition and feeding care, rather than rebuilding the whole pen |
Match the food to the animal's diet
Herbivores eat plant food, carnivorous animals depend on suitable animal food, and omnivores accept a wider mix. Those labels are a starting point, not permission to feed every species the same stack. Check the actual diet entry before moving your reserve.
Domesticated animals don't all eat hay. A hay-fed herd and pets eating prepared food can need different feeding spots. Kibble lets many animals eat a processed mix of plant and animal ingredients, but wargs still need raw meat or corpses. If one species ignores food that the others eat, check that difference before changing the whole setup.
How to feed farm animals in pens
Farm animals that use pens aren't controlled by an allowed area. Cows and alpacas need a suitable enclosed pen with a pen marker; painting a pet zone over your food store won't give them access to it.
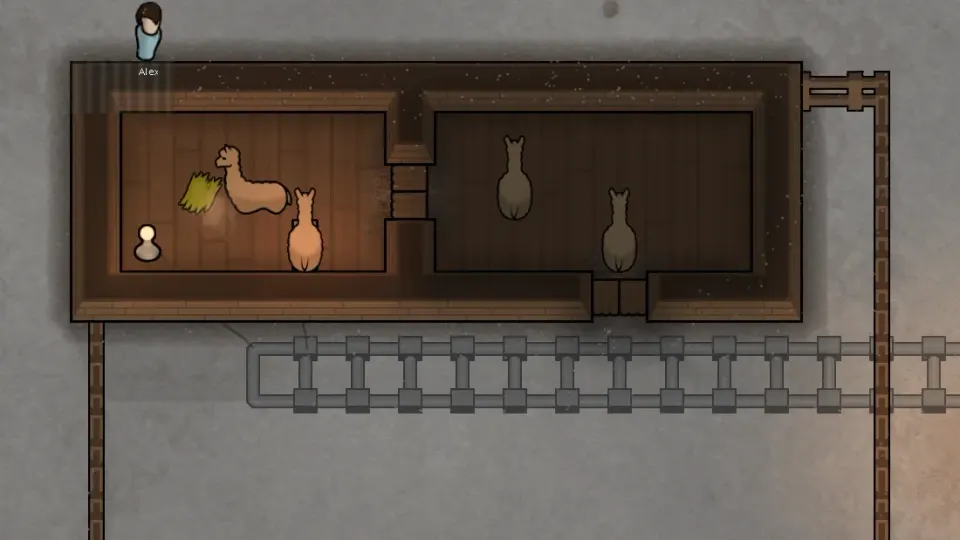
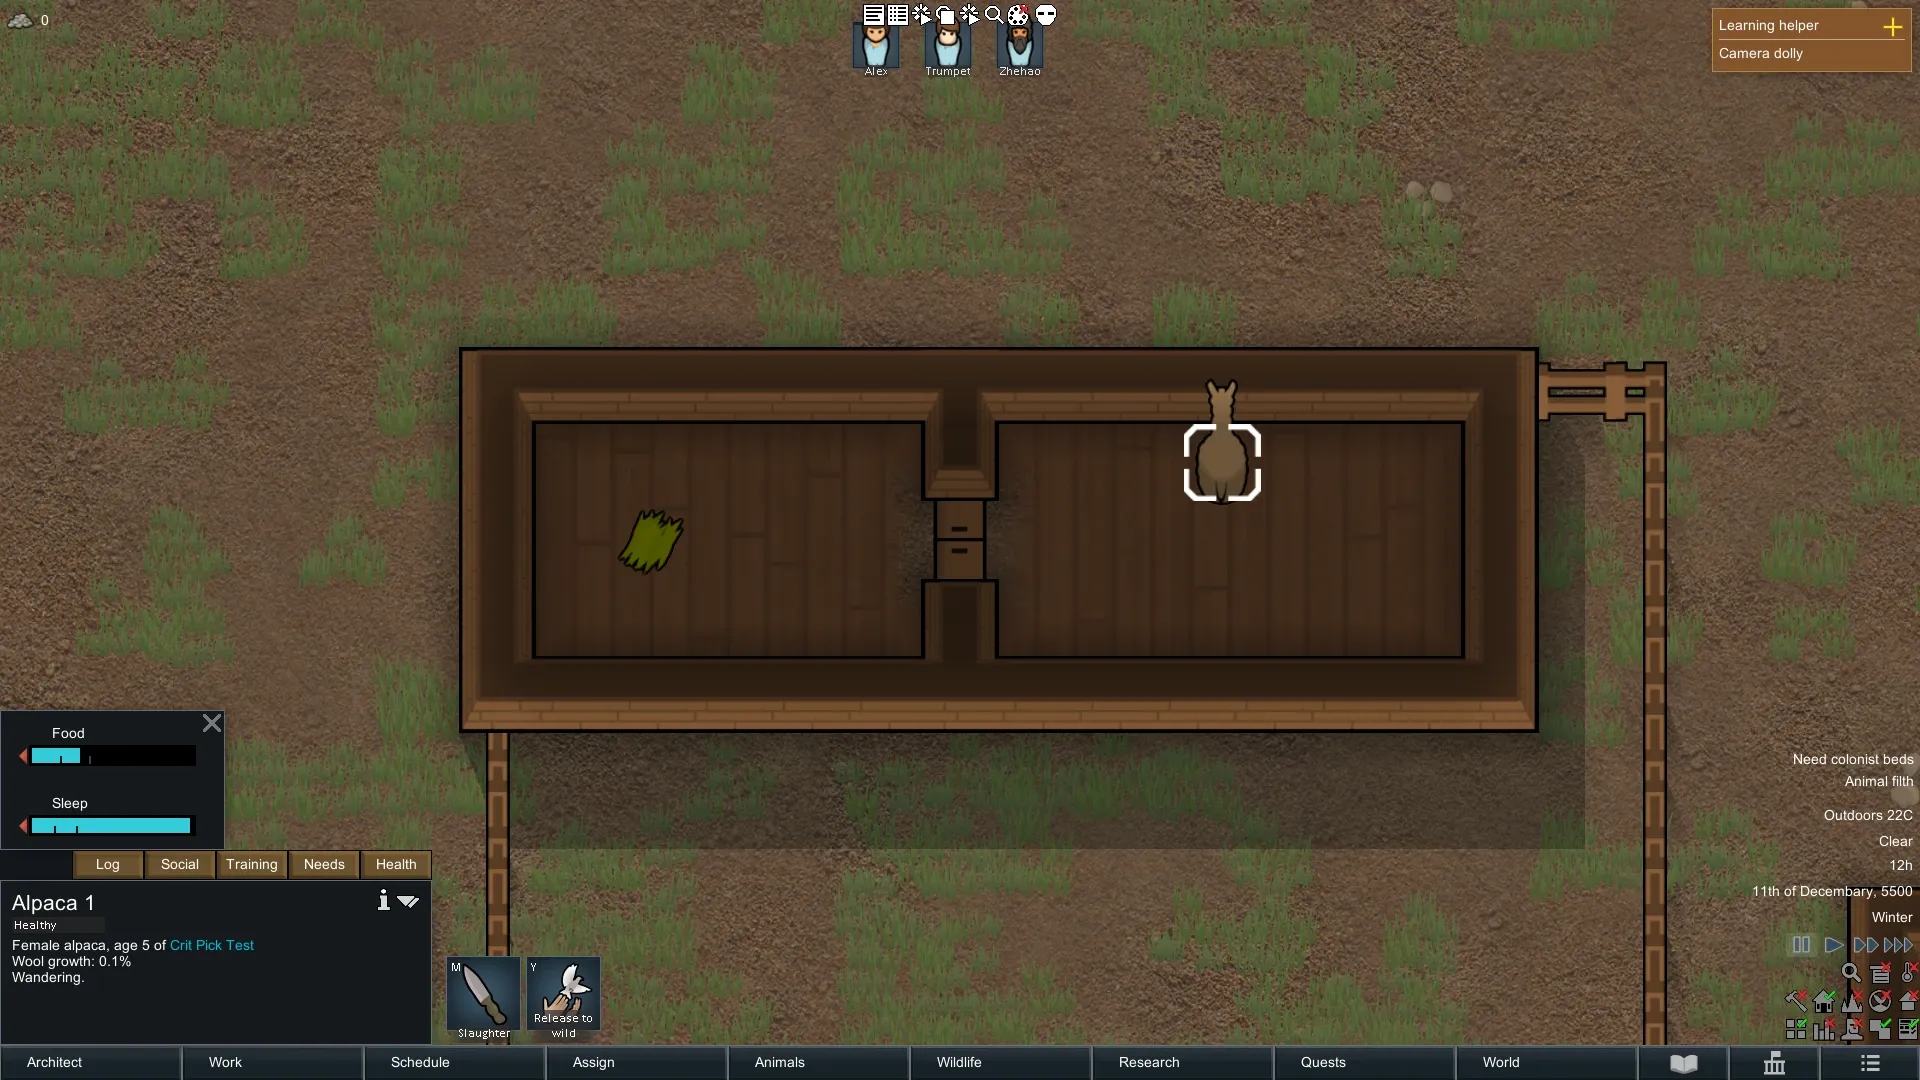
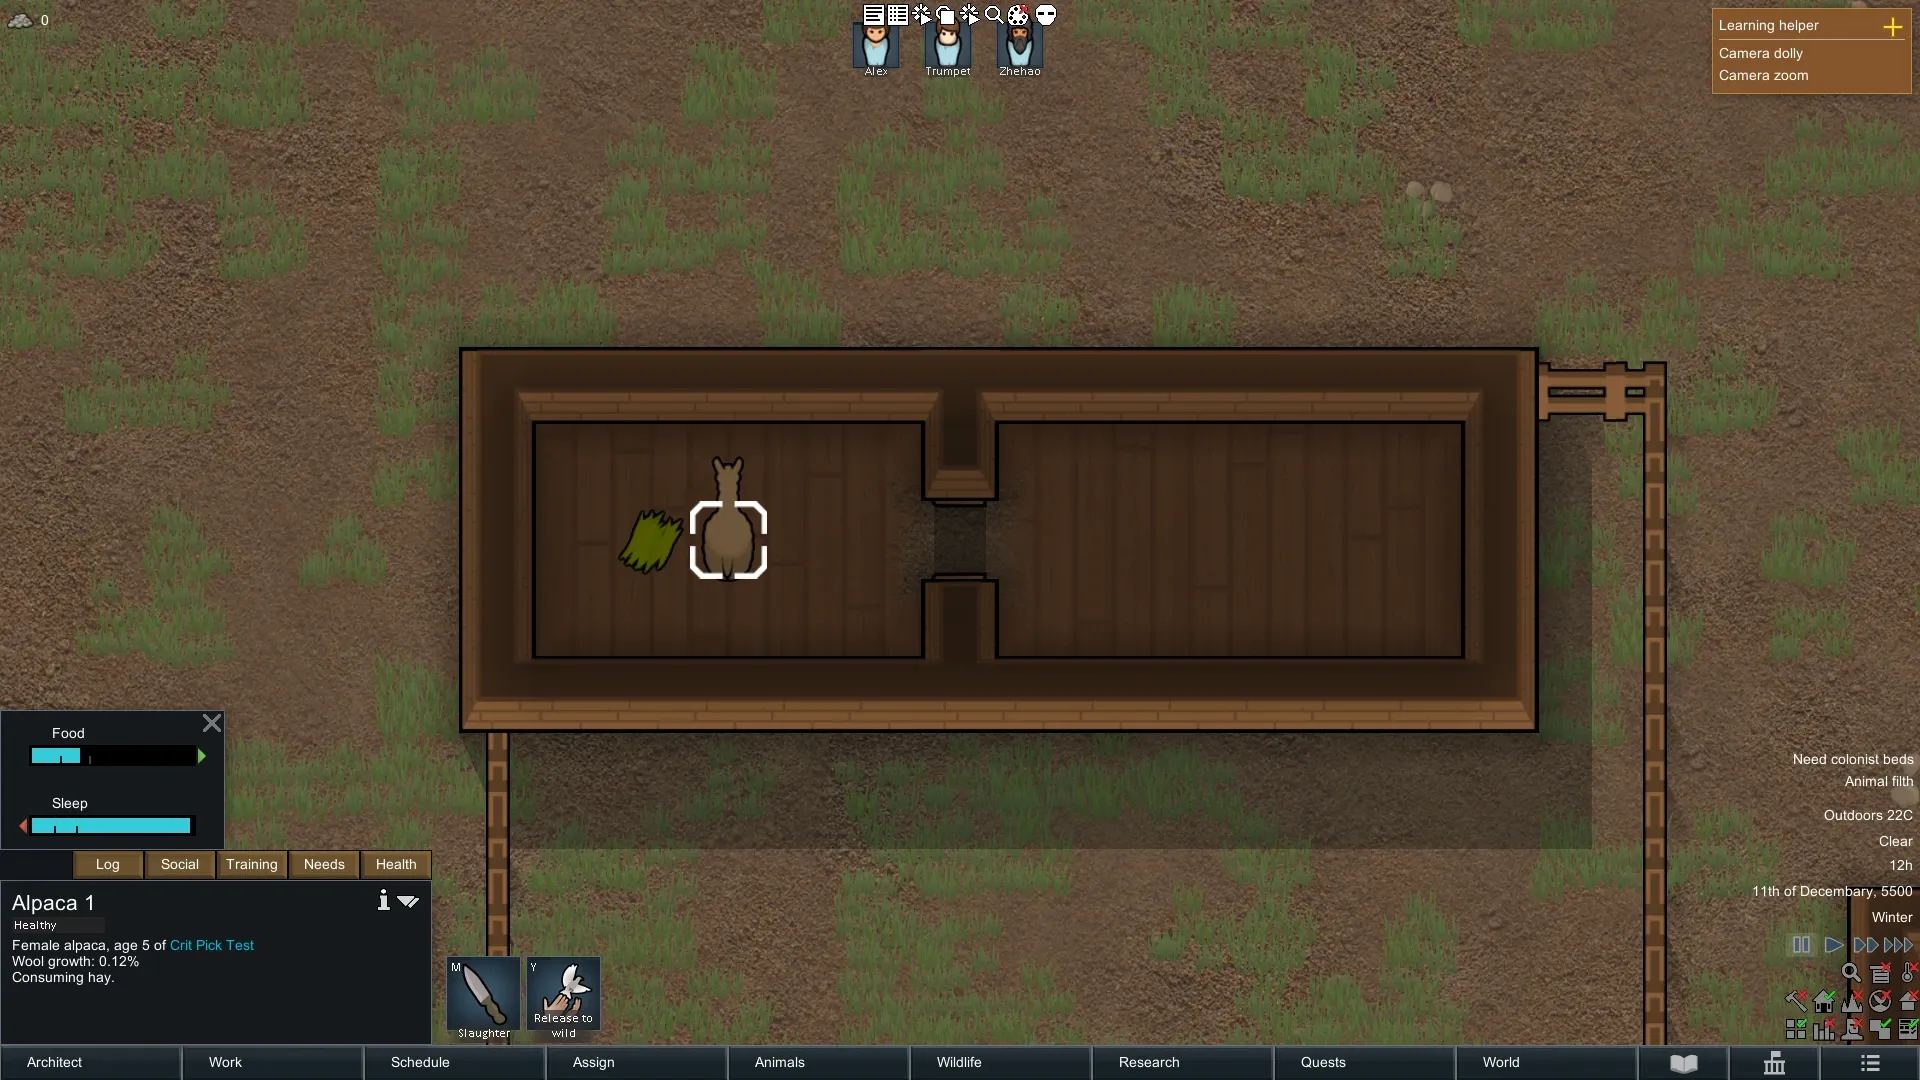
A common layout problem is a barn attached to the pasture through a normal closed door. That door divides the space for penned livestock. An animal flap lets them move between the pasture and the feed inside. Keep the outside boundary secure: opening the whole enclosure can create a roaming problem.
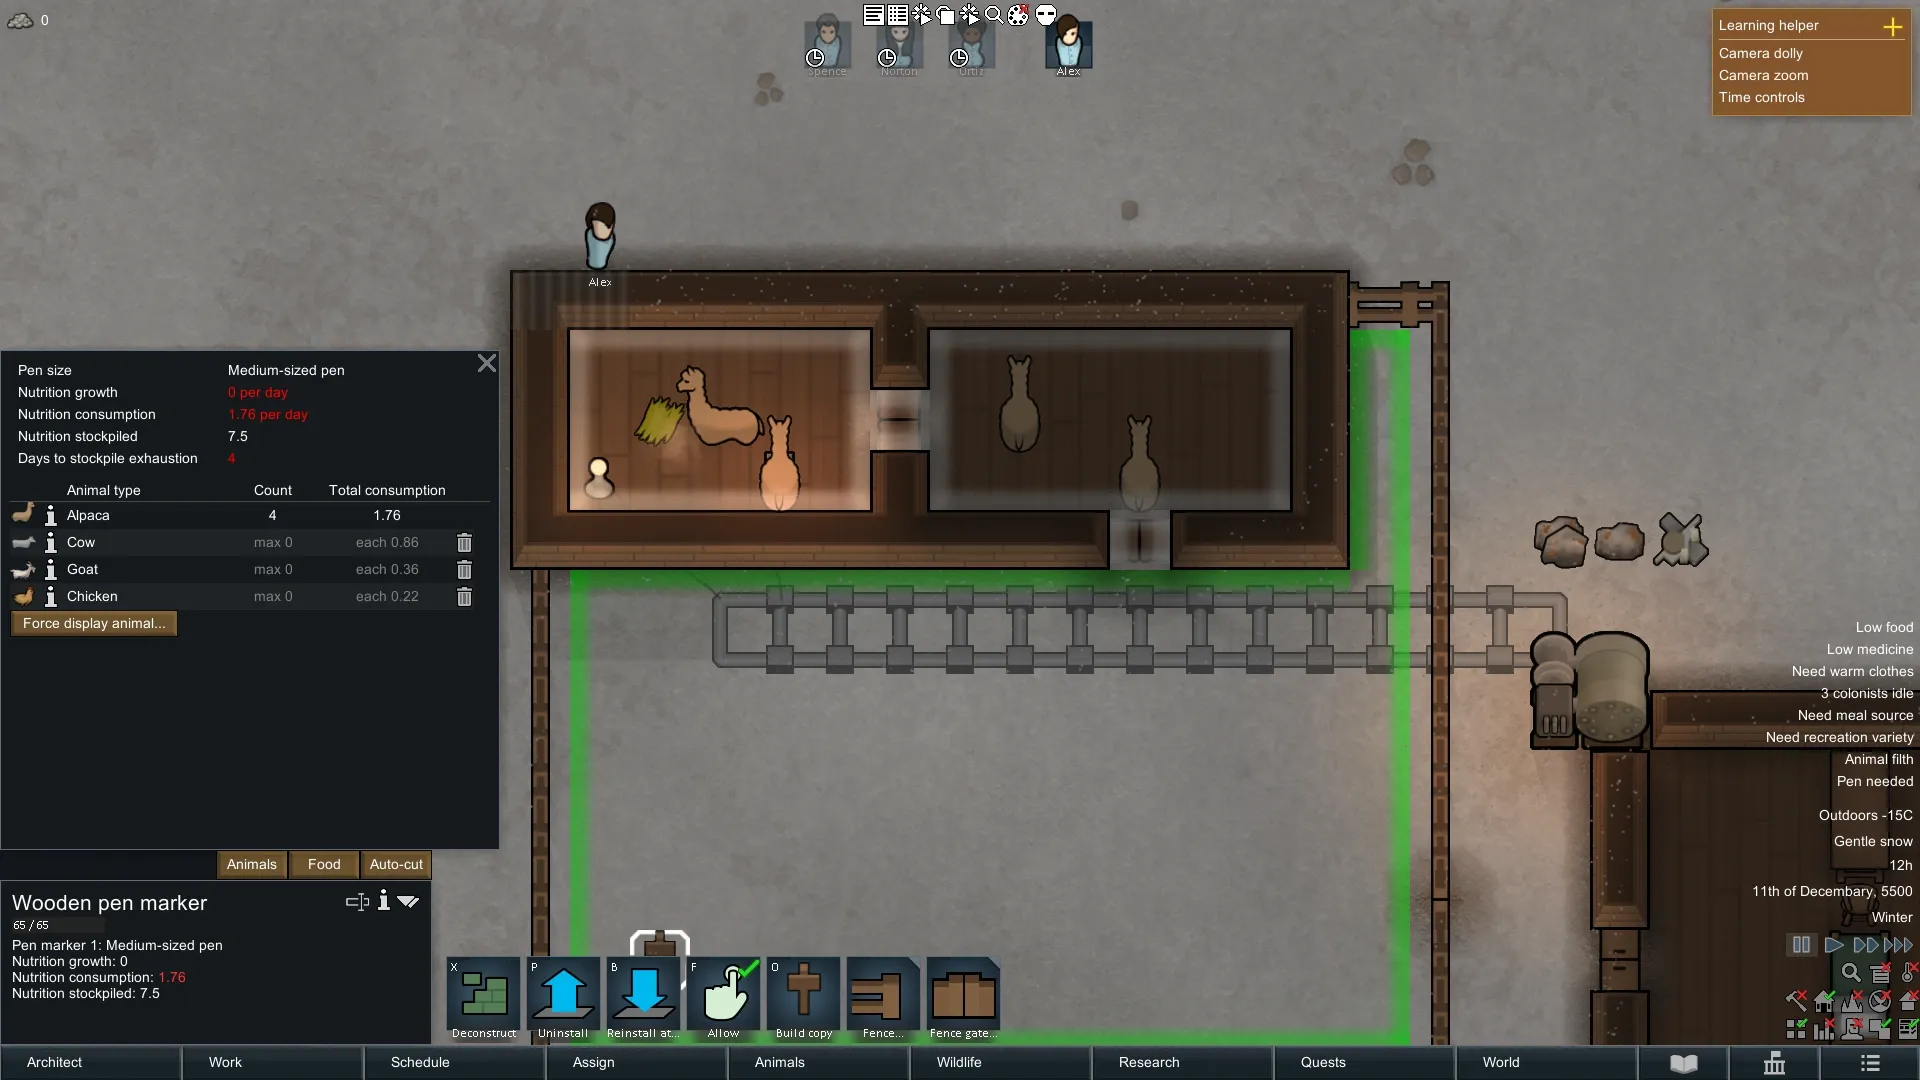
Put a small feeding stockpile in the accessible barn, then make sure food has actually been hauled there. Select the pen marker and inspect its Food information too. It helps you compare grazing supply and consumption; it doesn't promise that today's vegetation will support the same herd through winter.
Shelter is a separate check. An animal flap provides access, but it doesn't heat the barn. Check the animals' comfortable temperatures and the conditions where you expect them to shelter.
Tamed animals with allowed areas: include food and exclude your meals
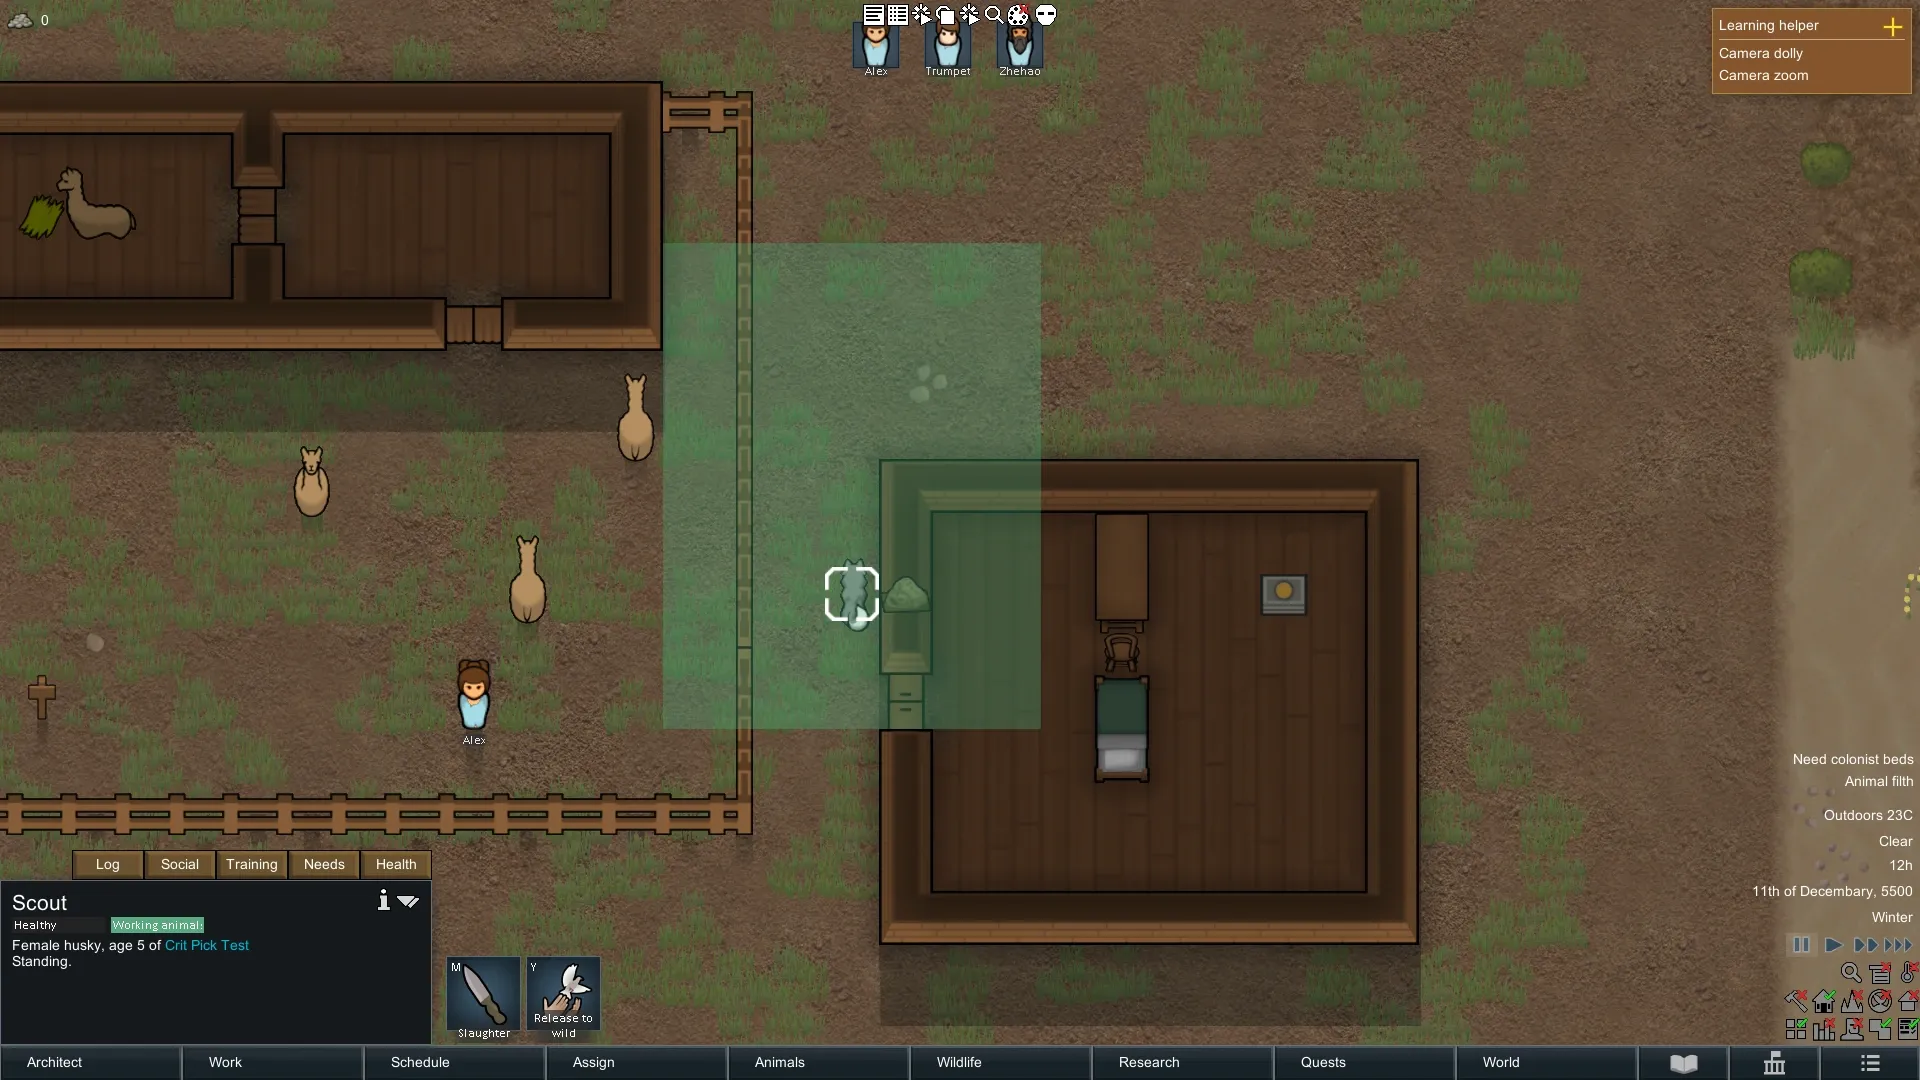
For animals that use allowed areas, select the correct area in the Animals tab. Include their feeding spot and somewhere suitable to rest. Check the physical route as well as the painted tiles.
You can use this to keep pets and working animals away from your meal storage while giving them their own compatible feed. Inspect every animal that should use the arrangement; creating an area doesn't assign the herd to it.
Treat an allowed area as a behaviour restriction rather than a solid fence. Following a master and movement between separated parts of an area can complicate where animals go. A simple, connected layout is easier to inspect than scattered patches across the base.
Make the feeding spot refill
Storage settings tell haulers what belongs in a stockpile. They don't change an animal's diet.
For a straightforward hay-fed pen, make a small stockpile that accepts hay, give it a higher priority than your main hay store, and leave space for deliveries. If it stays empty, check whether the food and destination are reachable, whether a hauling pawn is available, and whether another higher-priority store is taking the supply.
Keep this spot small enough to inspect easily. The rest of the reserve can stay protected elsewhere, provided somebody can keep delivering it. Before winter, let the arrangement run and watch a delivery followed by feeding. That checks the part a warehouse total leaves out.
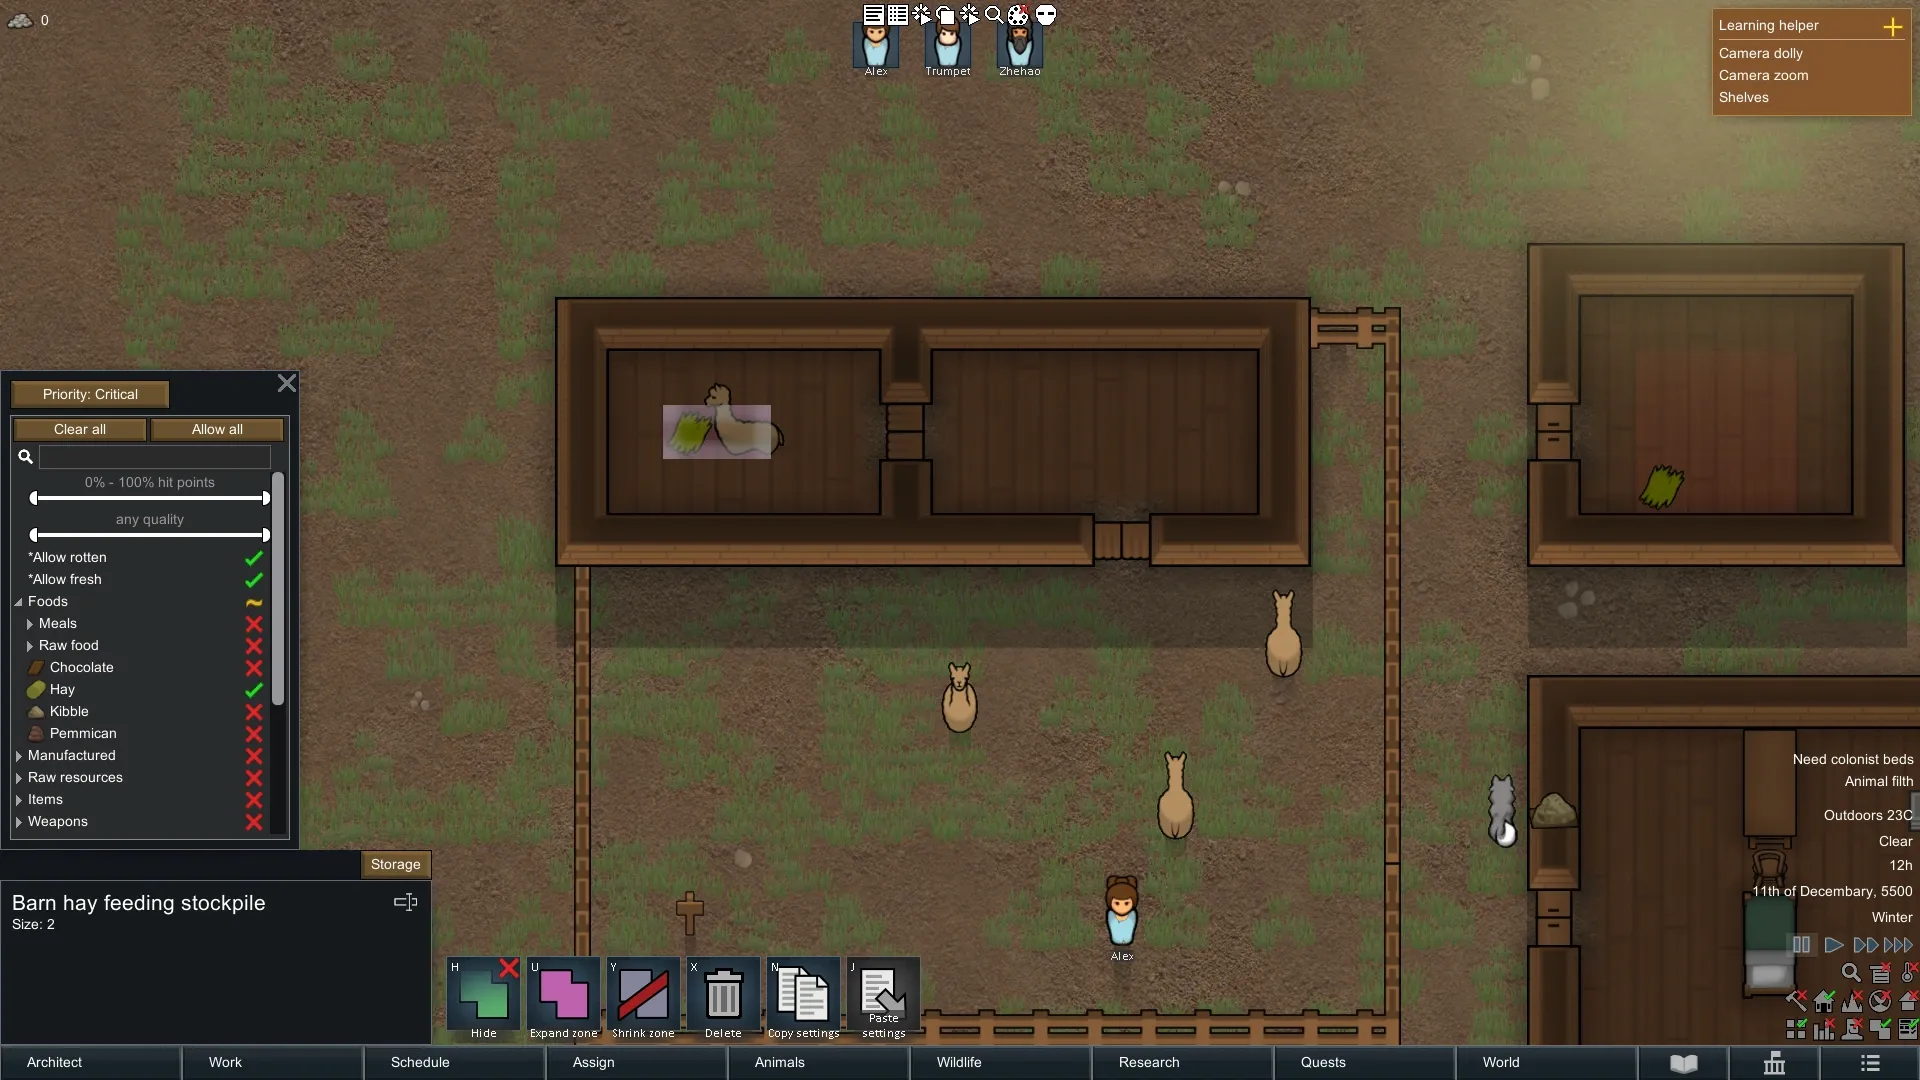
Animal food: grass, hay and kibble
| Food source | Useful role | Main limitation |
|---|---|---|
| Grass and other edible vegetation | Grazing while the ground and weather support it | Can be depleted or become unavailable; it isn't a stored reserve |
| Harvested hay | Stored feed for animals whose diet includes it | Needs growing, harvesting, storage and delivery; unsuitable for many pets and predators |
| Kibble | Stored mixed feed for many different animals | Takes processing and both plant and animal ingredients; wargs won't eat it |
Keep reserve haygrass away from hungry animals
Haygrass is the crop. Hay is what you haul away after harvesting it. For a winter reserve, put the growing zone outside the animals' reach so it can reach harvest rather than being eaten in the field.
This doesn't mean haygrass can never grow in a pen. It means a field you intend to harvest shouldn't also be the herd's immediate food source. Grazing it now uses the crop you were counting on storing later.
Straw matting is flooring. Laying it in a barn doesn't leave edible hay on the ground. Keep actual feed in a stockpile.
Which animals eat kibble, and how do you make it?
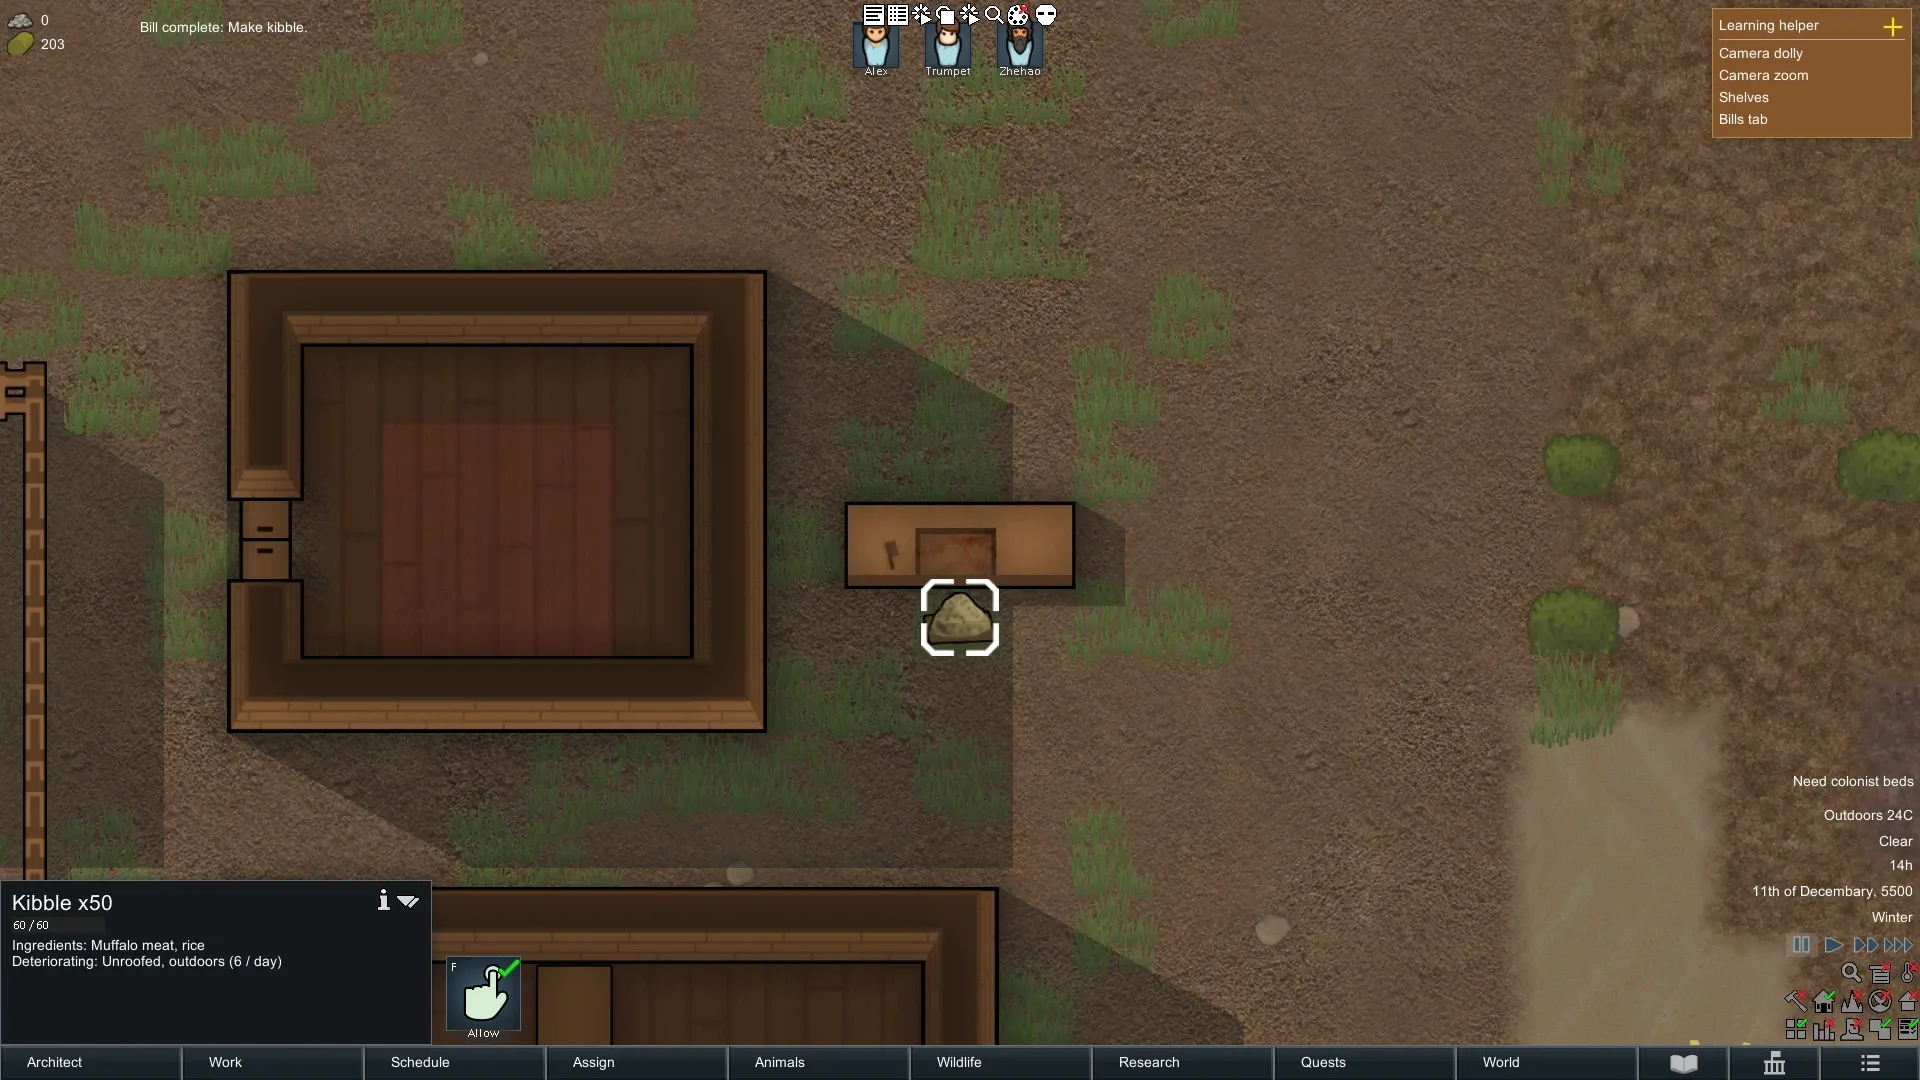
Kibble combines plant ingredients, which can include hay, with meat or other permitted animal ingredients. Add a kibble bill at a butcher table and check the bill's ingredient settings. Vegetables and hay belong on the plant side; allowed meat belongs on the animal side. Insect meat can be useful here if you aren't reserving it for another use. Human meat is also a permitted ingredient; exclude it in the bill if you want to keep it out.
The wiki documents 1 nutrition from plant ingredients plus 1 nutrition from meat or animal products, producing 50 kibble at a butcher table. A butcher spot produces 35 from that input. These are nutrition amounts, not one piece of meat plus one vegetable. Use the table when you can: the spot gives less feed for the same ingredients. The reconstructed checks produced 50 at the table and an increase of 35 across the merged stacks after a spot bill; they do not measure sustained production speed.
Set an amount that suits the animals you keep, then confirm somebody completes the bill and hauls the output. A bill waiting for ingredients doesn't feed anything. Kibble is useful when those ingredients are available and the animals won't eat plain hay.
It also avoids tying every hungry animal to a full colonist meal. Small animals can waste nutrition by eating a whole meal when they need much less. That doesn't make kibble the best answer for every herd: it still takes ingredients and work.
Wargs are the clear exception to the usual kibble advice. Their documented diet is raw meat and corpses. A stack of kibble won't solve their shortage.
Protect stored feed from exposure. Kibble doesn't rot, but it can still deteriorate when stored badly. Don't turn that into an unlimited outdoor-storage promise. Store hay under cover and inspect the selected stack for freshness and storage warnings. Don't count spoiled or inaccessible feed as part of the reserve.
Optional mod: Vanilla Nutrient Paste Expanded
If you use Vanilla Nutrient Paste Expanded, its nutrient paste feeder can put meals at a feeding point supplied by pipes. That changes delivery, but your animals still need a compatible diet and access to the food. Keep the feeder inside the reachable pen or allowed area and check the network's ingredients, stored paste and power.
The main mod's inspected feeder outputs ordinary nutrient paste meals. Nutrient kibble pellets come from a separate add-on, not the main mod. The grinder also excludes hay, so a large hay reserve won't supply this processing chain. For small animals, don't assume the convenience of full meals means less food is wasted.
Treat this as an additional modded setup rather than the basis of the winter calculation below. Powered paste storage has different failure risks from stored hay or kibble. Keep compatible backup feed, and check compatibility separately for any pellet add-on.
The companion guide, RimWorld Nutrient Paste Expanded guide: pipes, feeders and animal food, explains the chain and the distinction between meals and pellets.
How to feed animals through winter
Count the period from when grazing stops being useful until it can support the animals again. That may extend beyond the season labelled winter. Your biome, weather and the recovery of vegetation matter more than a fixed calendar allowance.
Then work out the demand of the herd you intend to keep. Read current hunger values and include different life stages separately where needed. Births add mouths, and young animals change demand as they grow. A calculation for today's adults can become obsolete before the snow clears.
For a simple estimate:
Stored nutrition needed = daily herd demand × days without dependable grazing.
Convert that nutrition into the food you'll actually supply, then add a deliberate allowance for your own uncertainties. Keep colonist food, predator food and livestock feed separate when those animals can't eat the same things. Count food you'll need for other uses only once.
If the supply is short, choose while you still have options: obtain compatible feed, reduce the herd, or keep fewer breeding animals through the cold period. An unharvested field is a plan, not food already in storage.
Worked example: four adult alpacas
Suppose you're keeping four adult alpacas and choose to budget for 30 days without grazing. For this example, use the wiki's documented adult demand of 0.44 nutrition per alpaca per day and 0.05 nutrition per item of hay.
The reconstructed test's animal information showed 0.44 daily food consumption, its hay information showed 0.05 nutrition, and its pen panel showed 1.76 daily consumption for four alpacas. These are displayed values, not a measured winter-long consumption rate. Check your own animals and food before using them. The example assumes no births, purchases, deaths, other food sources or storage losses, and an unchanged hunger rate.
| Step | Calculation | Result |
|---|---|---|
| Daily herd demand | 4 × 0.44 | 1.76 nutrition |
| Demand over the chosen period | 1.76 × 30 | 52.8 nutrition |
| Convert to hay items | 52.8 ÷ 0.05 | 1,056 hay |
That gives a theoretical consumption budget of 1,056 hay for the stated period. It isn't a tested minimum or a guarantee of survival.
If you choose to cover 10 additional days, the calculation becomes 1.76 × 40 ÷ 0.05 = 1,408 hay. The extra 352 hay buys ten more days in this model. Ten days is an illustrative planning choice, not a recommended buffer for every map.
You can run it backwards too. If you have 1,000 usable hay reserved for these animals, 1,000 × 0.05 ÷ 1.76 gives about 28.4 days of theoretical demand coverage. If some of that hay is inaccessible, used elsewhere or lost, your useful coverage is lower.
This is why the stock count and delivery check belong together. Enough nutrition on paper still has to reach the animals.
Keep herd growth inside the food budget
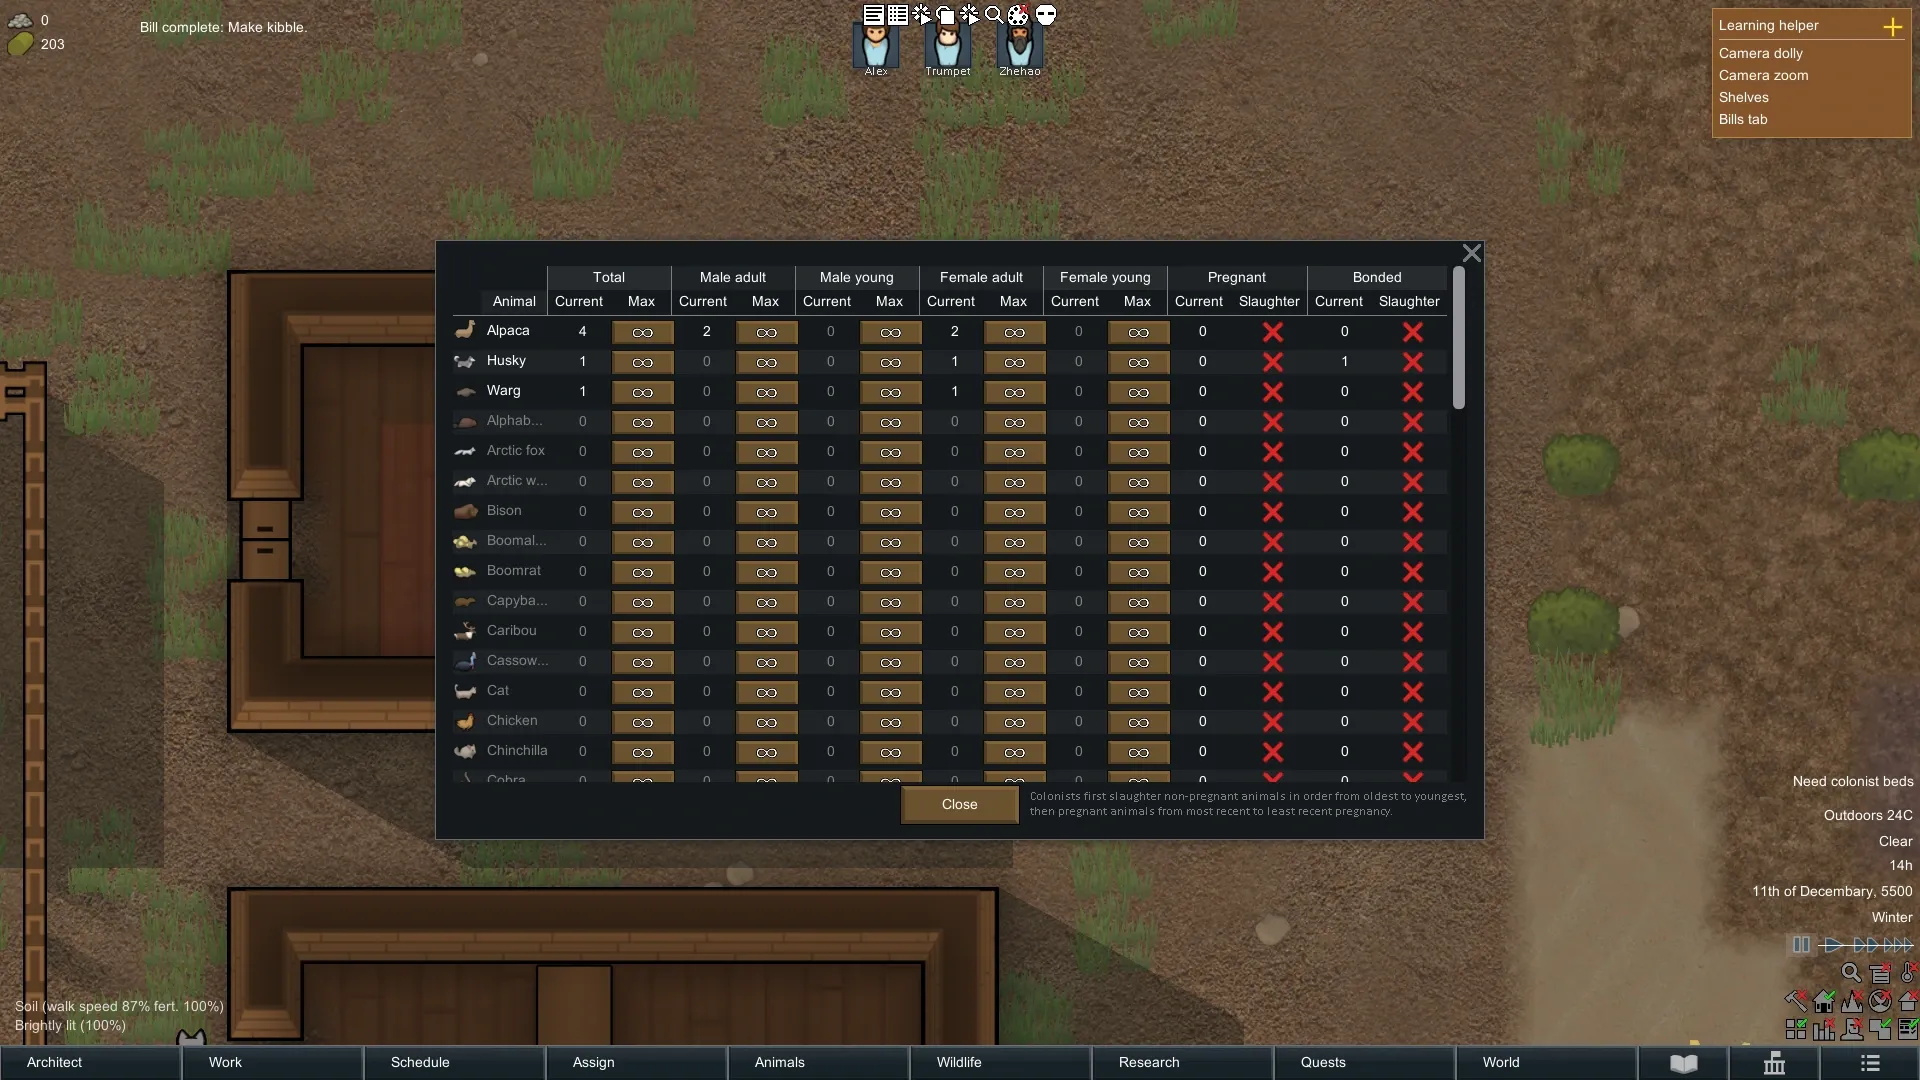
Open Manage auto-slaughter from the Animals tab and review the total, adult and young limits for each species. Decide which breeders you intend to keep before setting limits.
The limits can trigger separately; a low total limit can conflict with your breeding plan. Bonded and pregnant-animal protection can also leave the actual population above the number you expected. Inspect those options rather than treating the menu as a guaranteed cap on every animal present.
The work still has to happen. Check the herd after changing limits and confirm a suitable handler can carry out the orders. If you want breeding to pause, separate males and females into genuinely separate pens or allowed areas as appropriate. Recheck demand when young mature or animals return from elsewhere.
Feeding animals in RimWorld: FAQ
Does a pen marker feed animals?
No. It defines and helps manage the pen. Animals still need edible vegetation or compatible stored food they can reach.
Why won't my animals eat hay?
Check their diet first, then their access to the actual hay stack. Hay suits hay-eating livestock; it isn't suitable food for every pet or predator.
Is kibble safe to use for every animal?
No. Wargs are a documented exception and need raw meat or corpses. Check the diet of special DLC or modded creatures before including them in a shared feeding setup.
How much hay should I store for winter?
Use your herd's daily demand and the period without dependable grazing, then account for growth, losses and uncertainty. The alpaca calculation above is an example with stated assumptions, not a universal reserve.
Sources and verification
The 1.3 announcement separates the free pen system from the Ideology expansion.
Mechanic references: RimWorld Wiki on animals, pens, animal flaps, allowed areas, stockpiles, pen markers, haygrass, hay, kibble, wargs, animal husbandry, alpacas and straw matting. Sources accessed October 24, 2026. The wiki is community-maintained. Reconstructed in-game checks on October 24, 2026 confirmed the illustrated door/flap access change, actual feeding, kibble output and the displayed example values. Weather and starting conditions were prepared for the images. They are not a full winter survival test, a crop-yield measurement or an automatic-slaughter execution test.