Star Wars Zero Company: the best class combinations
Medic plus Scout is the best class combination in Star Wars Zero Company - and the order of your two specializations matters more than the pairing.

The best class combination in Star Wars Zero Company is Medic plus Scout on a single operator. But the setting that decides more of your run than the pairing itself is the one almost nobody mentions: which of the two you put first.
Electronic Arts calls them Specializations, not classes. Eight are standard and open to anyone: Assault, Gunslinger, Heavy, Medic, Scoundrel, Scout, Sharpshooter and Soldier. Four are exotic classes, locked permanently to one operator each. Partway through the campaign every operator gains a second class slot, and that is the moment Zero Company stops being about who you bring and starts being about what you stack.

The order of your two specializations matters, and the game never says so
Start here, because it changes every recommendation below. Your first specialization gets one extra rank on every ability. The second one caps a rank lower, and its upgrades cost more focus points. A Medic in slot one reaches Combat Stim VI, which turns the buff into a strong stimulant lasting the whole fight. A Medic in slot two tops out at V and never gets there.
“The first specialization has ONE extra level for every skill… If Medic is Spec 2, you can only get up to Combat Stim V. TLDR: the order of Specializations MATTERS!”
VlPER · r/ZeroCompanyThat post is the most-upvoted thing the subreddit has produced about builds, and it exists because the tip was missing from the guides at launch. It is also fixable at any time: any character can respec into any standard specialization whenever you like, so the order is a slider, not a commitment.
Star Wars Zero Company has twelve classes by EA’s own count, and we break all of them down on the full classes page rather than repeating it here. One correction is worth carrying over: EA’s marketing copy says every specialization has three abilities — an Ultimate, a Standard and a Passive. Heavy has five. Conditioning, Heavy Armor Training and Intimidating Posture are all passives on the same standard class, and EA’s own help article quietly says “at least two Passive abilities” instead.
Advantage is the resource the whole game runs on
Advantage is a shared combat resource. The squad earns one point each time an operator damages an enemy, the pool caps at ten, and it pays for special actions without touching action points. Ultimates come out of it.
Ten is not much. Rocket Strike costs ten on its own, which makes Rocket Strike a once-a-fight event rather than a rotation piece. Ambush eats the entire pool with a floor of four. So a squad where all four operators want an ultimate is a squad where three of them are waiting — which is why every good pairing either generates advantage points or spends them cheaply. The combinations that work feed a resource loop: one class generates, another spends, and the turn pays for itself.
Medic plus Scout: the combination to build first
Scout’s Combat Recon costs one action point and grants Advantage for every enemy it detects. On a map with six enemies in view that is one action point converted into six Advantage for the whole squad. Nothing else in the game trades at that rate, which is why Scout sits at or near the top of every ranking that exists.
Medic is the other half for a reason that has little to do with healing throughput. It is the only support class that rallies a downed operator back to full health, through First Responder. Everything else gets them up partially. With permadeath in play — three injuries kill an operator, and each injury costs ten percent of their chance to hit — that gap decides missions. Combat Stim is the other half of the case: one action point, and an ally spends two turns with more health, more melee damage and more ranged damage.
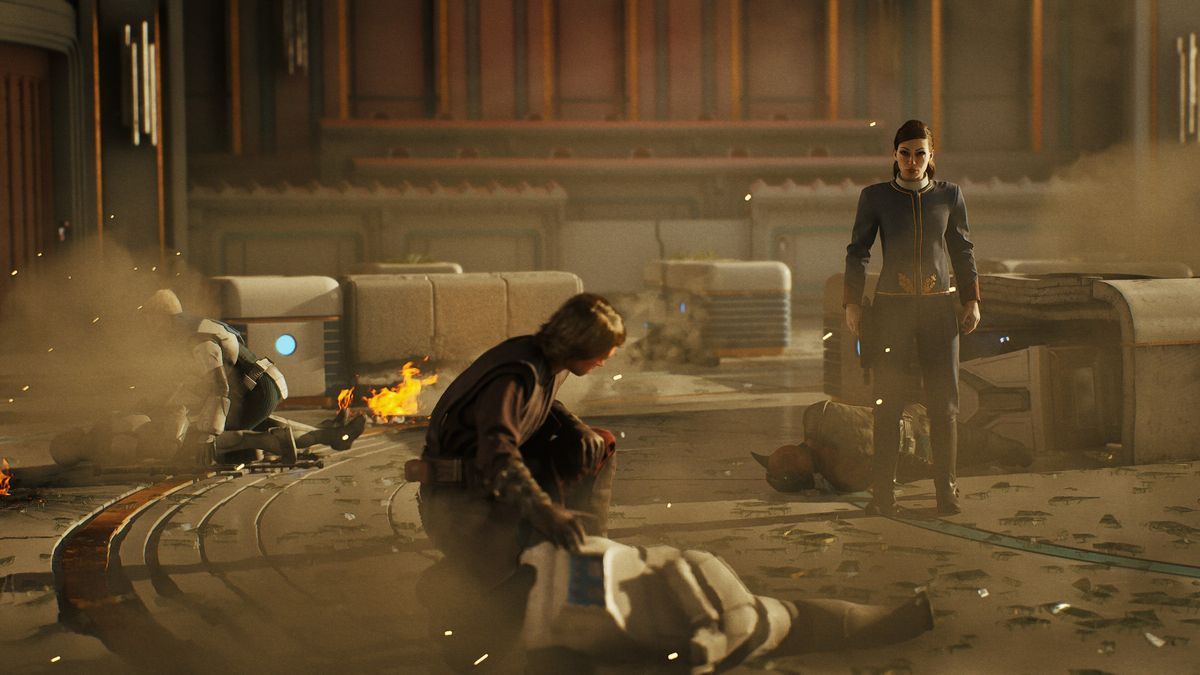
Both Mobalytics, which calls it “the best support combination in the game”, and Hack the Minotaur, whose Scout guide names Medic as its primary pairing, land here independently. So does the subreddit: Hawks as Medic/Scout is the single most-repeated slot in every squad-comp thread.
And there is a slot argument on top. Four operators go on a mission, Hawks is mandatory on story missions, which leaves three. If Medic and Scout are two different people, they are two of those three. Stack them and you have bought back a seat for something that kills things.
Scoundrel plus Sharpshooter: when one thing has to die
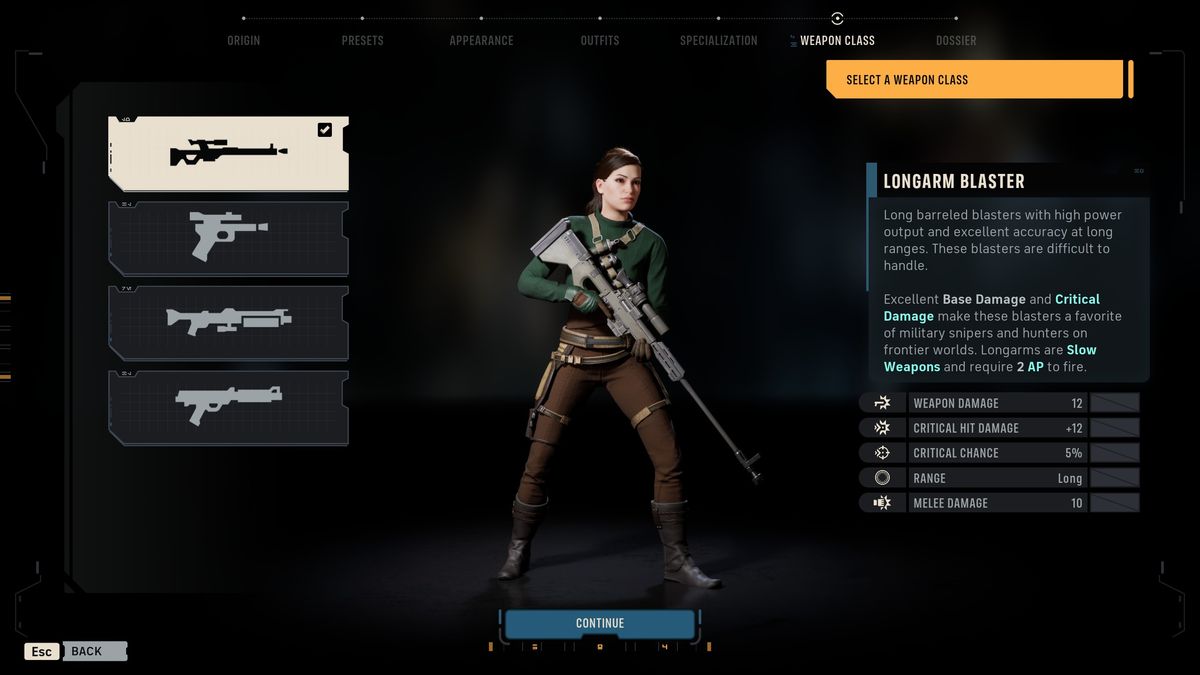
This is the best-attested pairing in the game — seven outlets recommend it independently. Scoundrel’s Identify Weakness costs one action point and makes an enemy Vulnerable, turning the next damaging attack into a guaranteed critical hit. Sharpshooter’s Precision Shot always hits and, at max rank, carries a large critical damage bonus. One sets up, the other cashes in.
One dangerous enemy that has to die on your turn. The pairing converts Advantage straight into a guaranteed critical kill, and Scoundrel’s defense penetration keeps it working on armoured targets.
Zero In is removed if you move or get knocked out of position, and the Longarm Blaster costs a flat 2 AP per shot. Players report the maps rarely offer a vantage point worth standing still for.
The Epic Games Store guide runs it on Luco Bronc, wanting Scoundrel’s Instinct and Never Play Fair for defense penetration and assist damage. KeenGamer calls Sharpshooter/Scoundrel the strongest offensive Hawks setup.

The honest caveat is that Sharpshooter is the most contested specialization in the game, and the players who dislike it all give the same reason — it is not the numbers, it is the level design. As one put it, the class “didn’t make sense with how much the game wants me to move and how little full cover there is”. The counter-position, equally common, is that Sharpshooter is weak as a first specialization and excellent as a second one.
Mandalorian Warrior plus Gunslinger: the pairing that broke the game
Cly Kullervo is the exception among exotic operators. Tel-Rea’s second slot is locked to a Jedi tree and the Astromech’s is locked to Analytics, but Cly gets a free pick from all eight standard specializations on top of her Mandalorian Warrior kit. In the focus tree the game labels her first slot simply SPEC 1: WARRIOR.
Her unique talent is Combat Jump, which costs Advantage rather than action points and drops her anywhere on the map. It is the reason she ignores the cover system, and it is what every Cly build is really built around.
The consensus second class is Gunslinger, and the reason is an interaction no guide site documents: her Electroweb Darts each add a stack of Onslaught, the Gunslinger passive that raises the damage of every blaster attack made in the same turn. Dart seven enemies and your first pistol shot lands with seven stacks behind it. Players kept discovering this by accident.
“She can farm back a lot of advantage by finishing off targets with Quick Draw, and the fact that her electrodart shots trigger Gunslinger’s Onslaught is simply awesome.”
Trolleur_Durden, on a completed hardest-difficulty run · Steam DiscussionsThe alternatives are real, not filler. Epic’s guide picks Scout, using Combat Recon and Tactical Timing to bankroll more darts. Assault is the in-game default and gets defended for its free crit chance against exposed targets. And Heavy is the durability answer: pair the taunt with her jetpack and she drops into a crowd that then cannot meaningfully hit back.
Whichever you take, the community verdict on Cly herself is close to unanimous — she is overtuned. The clearest statement of why is that her dart-and-web damage is uncapped where the other area ultimates are capped, on top of jetpack movement that ignores the cover system.
Scoundrel plus Gunslinger: damage that pays for itself
Gunslinger is the sustained-damage answer, built on action point economy rather than raw numbers. Quick Draw fires a sidearm shot for one action point and refunds that point on a kill. Onslaught makes every shot in a turn hit harder than the last. And the Blaster Pistol charges one action point per shot with no escalation, unlike the Blaster Rifle, which charges one for the first and two for each after it.
Weapon types matter more here than on any other class. The pistol is a close range weapon and the Gunslinger is a close range specialist, which is the honest limit of the build: at medium range the damage falls off before the stacking pays off.
The low base damage is the catch, and Scoundrel is the fix. Identify Weakness guarantees the critical that a Quick Draw needs to secure its kill and refund its own cost. Hack the Minotaur calls Scoundrel “the strongest pairing for guaranteed critical bursts” on the class, stacking the mark with Keen Eye’s crit chance and the shots from Open Fire.
It is worth knowing that the pistol build has a loud sceptic. The counter-argument, made repeatedly on Steam, is that against late enemies with high health and armour the per-shot bonuses get eaten by mitigation, and the turn requires near-perfect positioning to pay off. On normal difficulty that objection does not bite. On expert it does.
Five more pairings worth building
The four above are the ones with the most evidence behind them. These five come up next most often, and each solves a specific problem rather than being a generically good pile of stats.
Scout + Heavy is the one to try if you liked the Advantage argument but want a frontline. Mobalytics calls it one of the best tank setups in the game, and the reason is arithmetic rather than taste: Bulwark is the cheapest ultimate at four Advantage, Combat Recon generates several per turn, so one operator can pay for their own taunt indefinitely. Nothing else in the game closes a loop that tightly on a single body.
Mandalorian Warrior + Heavy is the answer to Cly’s one real weakness. Combat Jump drops her into the middle of a group, which is exactly where her Electroweb Darts want to be and exactly where she gets shot. Adding the Heavy taunt means the enemies she just landed next to swing at the operator wearing the armour, and the defense bonus lands on the turn she needs it. On normal difficulty this is a comfort pick rather than a necessity — you will usually kill the group before it matters. It earns its place on harder runs, where one player finishing on the second-hardest setting described her as near impossible to kill while still clearing crowds with the darts.
Gunslinger + Soldier attacks the same problem as Gunslinger/Scoundrel from the other end. Instead of guaranteeing a critical hit, Soldier’s passive raises flat weapon damage, which lifts the Blaster Pistol far enough that Quick Draw secures kills on its own — and every kill refunds its action point, so the turn keeps going and Onslaught keeps climbing.
Scout + Sharpshooter is the nuke build for players who dislike waiting. Ambush spends the entire Advantage pool and scales with it, so the class that fills the pool fastest is also the one best placed to empty it. Zero In raises the hit chance beforehand, and unlike Precision Shot, Ambush can crit.
Soldier + Assault is the pure brawler, and the only pairing here with no ranged pretence. Both specializations bring a melee attack, both passives raise melee damage or movement, and Assault’s cone reduces the chance to hit of everything caught in it. It is the natural home for Trick, whose talent revives him once per mission and makes reckless positioning cheap.
What the whole squad looks like
The framework almost every guide converges on is that four operators should cover four jobs rather than four damage numbers: damage, setup, frontline pressure and support. Maintaining a balance between durability and damage is the whole point — a squad that cannot survive the enemy turn never gets to spend the Advantage it saved.
Four slots, Hawks in one of them on any story mission. Hawks earns the seat mechanically: Fearless Leader is a squad-wide passive scaling to +4 assist damage and +3 defense for everyone, it survives any respec, and he can separately spend Advantage to refresh one action point for a squadmate once per turn.
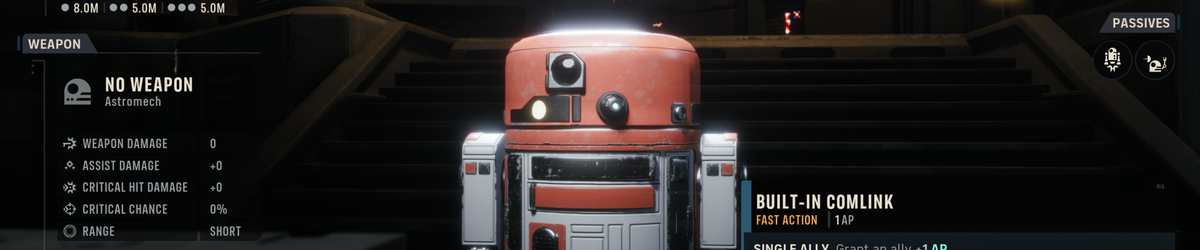
That shape is the community default rather than one site’s pick — one Advantage battery, one action-economy engine, one operator to spend it all, one flex. The Astromech in slot two is worth stressing because it is not a character: it is a droid you build yourself, and you can field more than one. Its most repeated piece of advice is counterintuitive — keep it out of cover, in the open, so enemies target the thing that heals itself to full every turn.
The other characters bring unique talents that shape which second class suits them, and some missions attach survival requirements to specific story characters — read the objective before locking your four. Trick’s unique talent revives him once per mission, which is why players push him into melee attack range and give him Soldier rather than something careful. Tel-Rea’s stacks Harmony, which her lightsaber attacks and force abilities then spend, and her Force Push is the piece that matters for everyone else: shoving a target out of cover turns a low-percentage shot into a clean one.
One practical note that saves a restart: named story characters have fixed talents that cannot be changed, while custom operators can take whatever you like. If you want a purpose-built tank, build it on one of your custom recruits — only custom recruits take a defensive talent freely. Hired operators are also where the bond system pays off fastest, since committing to the same four builds their bonds instead of resetting them.
Where the guides disagree, and where they are simply wrong
Star Wars Zero Company launched on 27 August 2026, developed by Bit Reactor and published by Electronic Arts, and no balance patch has shipped since. Bit Reactor has said a patch is coming for bugs and performance, with no balance changes named. Every tier list describing it, this page included, is describing a game that is days old.
Two of those disagreements are not really disagreements. Heavy is dismissed by players who finished on normal, where you can simply kill everything first, and defended as mandatory by players on expert, where the enemy turn actually hurts. One tier list benches it outright; the thread arguing the same thing was downvoted to zero by players who disagreed. Both camps are right about their own difficulty.
One claim is a straight error rather than a disagreement. GamesRadar reported that every character gets a second specialization “with the exception of Droids and Jedi”. Both exceptions are false: the Astromech receives Analytics, and Tel-Rea receives a second Jedi tree bringing Force Pull and Lightsaber Throw. Guide sites call that tree Wayseeker; the wiki folds it back into Jedi Padawan and does not name it separately. EA is silent on both.
The pattern worth carrying away: press guides written from review builds are dependable about story anchors and unreliable about system boundaries. The single most build-defining rule in the game — specialization order — was found by a player, not a guide.
Frequently asked questions
What is the best class combination in Star Wars Zero Company?
Medic plus Scout on a single operator, usually Hawks. Combat Recon converts one action point into Advantage for every enemy it detects, which funds the squad’s ultimates, and Medic is the only specialization that rallies a downed operator to full health. Stacking them also frees a squad slot. It wins on economy rather than damage.
Does the order of your two specializations matter?
Yes, and the game does not tell you. The first specialization gains one extra rank on every ability, while the secondary specialization caps a rank lower and costs more focus points to upgrade. A Medic in slot one reaches Combat Stim VI, which lasts the whole fight; in slot two it stops at V. You can respec and reorder at any time.
What second specialization should Cly Kullervo take?
Gunslinger is the consensus, because her Electroweb Darts each add a stack of Onslaught, so darting a crowd loads every following pistol shot. Scout is the main alternative and is what the Epic Games Store guide recommends, using Combat Recon to bankroll more darts. Assault and Heavy both have defenders too.
Can Jedi and droids get a second specialization?
Yes, despite widely repeated reporting that they cannot. Their second class slot is locked rather than absent: the Astromech receives Analytics, and Tel-Rea Vokoss receives a second Jedi tree granting Force Pull and Lightsaber Throw. Cly Kullervo is the only exotic operator who picks freely from the eight standard specializations.
Which specialization generates the most Advantage?
Scout, by a wide margin. Combat Recon costs a single action point and grants Advantage for each enemy it detects, so its value scales with how many enemies are in view. Advantage is otherwise earned at one point per damaging hit into a squad-wide pool capped at ten, which makes Scout the only reliable way to fund expensive ultimates.
Is the Heavy specialization worth bringing?
It depends entirely on difficulty, which is why rankings for it contradict each other so violently. Bulwark costs four Advantage, the cheapest ultimate in the game, so the area taunt can be maintained almost every turn. On normal difficulty you can usually kill faster than you need to tank. On expert, that taunt is what lets everyone else take risks.
Can you change a specialization after choosing it?
Yes. Any character — Hawks, story characters and custom operators alike — can respec into any standard class at any time, so an early pick is never a run-ending mistake. The exception is the exotic classes: Jedi Padawan, Mandalorian Warrior and Astromech stay locked permanently to their operators.
Is Sharpshooter good in Star Wars Zero Company?
It is the most contested specialization, and the objection is about level design rather than numbers. Precision Shot always hits, but Zero In is lost when you move, and players report the maps rarely reward long range engagements. The common resolution is that Sharpshooter underperforms as a first specialization and works well as a second.
How many classes does Star Wars Zero Company have?
Twelve by EA’s count: eight standard specializations plus four exotic classes. EA documents only the eight standard picks and never publishes the exotic list. Jedi Padawan class, Mandalorian Warrior and Astromech class are well established; the fourth is reported as a Clone Commando tied to Trick late in the campaign, which EA has never confirmed.