
Kingdom Two Crowns: Shogun guide
Ninja, the Kirin and campaign progression in the Shogun setting.
On this page
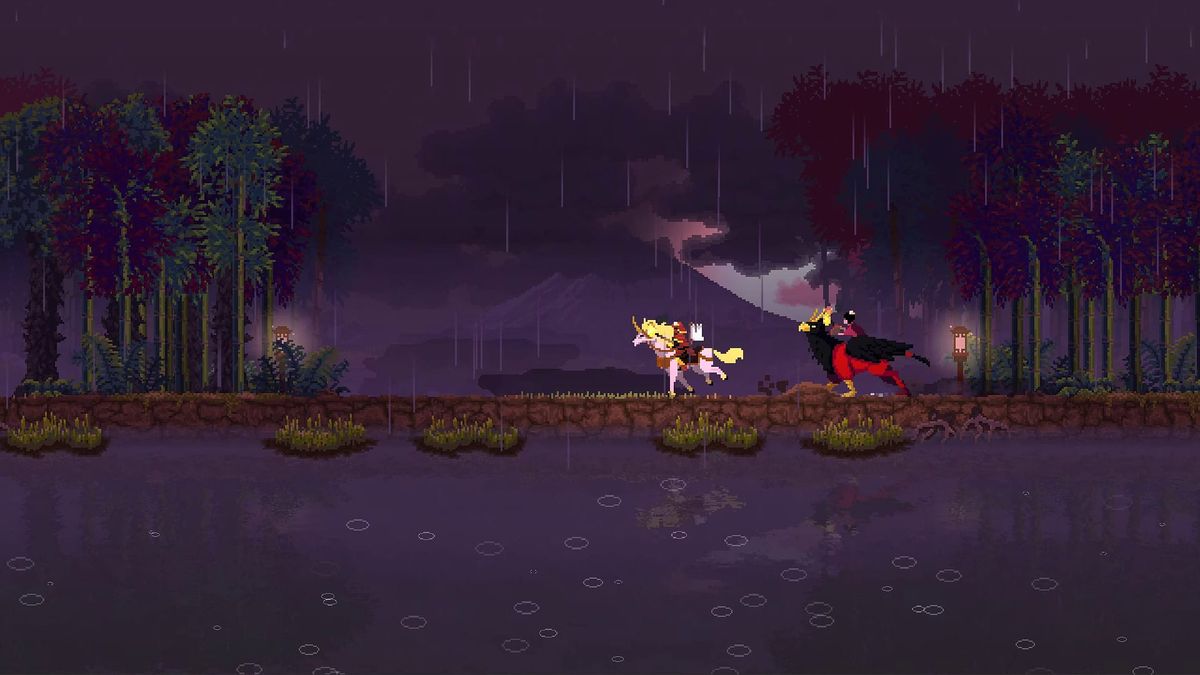
Shogun keeps the five-island campaign and its stone-to-iron progression, but replaces the medieval setting with feudal Japan. The changes that affect your decisions most are ninja and the denser bamboo forest. Ronin and samurai fill the roles of squires and knights; the Kirin is this setting’s version of the Unicorn.
Ninja: fishing by day, ambushes at night
Upgrade the town to stone fortifications and provide a stone back wall to make the dojo available. A ninja kit costs 2 coins and is picked up by an unemployed villager. A dojo serves its own side of the kingdom; training on one side does not automatically cover the other.
Ninja fish during daylight, then enter the bamboo to ambush the Greed at night. Treat them as support for your defence. They are temporary units, so keep replacement tools and recruits available. Portal assaults still need your regular army; do not plan a campaign around ninja clearing the map for you.
Bamboo changes how you expand
The forest is denser than in the medieval setting. Clearing it takes more builder time and returns more coins. That extra work matters when a new wall is far away: start clearing early and expand in manageable steps. Protect recruitment camps and avoid leaving workers outside after dark simply to finish one more patch of forest.
Mount stamina, speed and feeding
Bars show relative ratings, not measured speed or sprint times. Hover or tap a skill or Food for details. Finish feeding before a long trip; the well-fed reserve expires even while you stand still.
The starting horse has average speed and stamina and grazes on open-field grass.
What each unlock does
Gems pay for the one-time unlock. Coins are a separate payment to ride a mount, activate a statue or carry a hermit. A hermit’s 1-coin ride does not include the building conversion. Technology prices do not include local town or wall upgrades. The starting horse is free.
Ranks: our practical priorities within each category and campaign. S = first pick, A = strong, B = useful, C = situational, D = low priority, E = weak, F = avoid. Hover or tap a rank for the trade-off; no tier is filled just to use every letter. Comparison sources.
| Unlock | Effect | Use / requirements | Rank | Island |
|---|---|---|---|---|
| Archery statueStatue3 gems10 coins | Improves your archers’ accuracy. | Pay the coin offering after the gem unlock. The blessing applies across the campaign; reactivate it after losing the crown. | S tier: A first priority: better accuracy helps your main defenders and hunters throughout the campaign. | Island 1 |
| GriffinMount2 gems8 coins | Its wing blast pushes Greed back, buying defenders time. Use the mount action near a wave. It can feed anywhere, but still has limited stamina. | MovementBlocker SpeedFast StaminaGood Catches rats anywhere when stopped, including in winter and caves. Its wing blast still spends stamina. | S tier: Fast travel, knockback and feeding anywhere make this the safest general-purpose pick, including in winter and caves. | Island 1 |
| Ballista HermitHermit3 gems1 coin | Converts a high-tier archer tower into a long-range ballista. | Carry the hermit to a triplet-or-better tower and pay for conversion. A builder operates the weapon; the former tower archers return to normal work. | A tier: Strong tower support when a good tower spot covers the approach. Poor placement or exposed crew lowers its value. | Island 1 |
| Stone mineTechnology10 coins | Unlocks stone technology across every island in this campaign. | Pay at the mine, then buy the local town and wall upgrades. The mine itself does not turn existing wooden walls into stone. | — | Island 2 |
| Scythe statueStatue1 gem7 coins | Lets farms support more plots and farmers. | Activate the blessing and leave enough clear space around the farm for the extra plots. | B tier: Good once you can staff spacious farms. It adds little before farming is established or where plots are cramped. | Island 2 |
| StagMount1 gem3 coins | Attracts deer so they follow you towards your hunters. Ride close to deer, then lead them back to your archers. | MovementEconomy SpeedFast in forest StaminaSlightly above average Grazes on open-field grass. It cannot feed beneath forest cover, despite travelling faster there. | A tier: An excellent early scout through forest, with deer income on the way home. It still needs open grass to feed. | Island 2 |
| Stable HermitHermit1 gem1 coin | Converts an upgraded farm into a stable for unlocked mounts. | Carry the hermit to a mill house. Construction costs 8 coins; mounts available at the stable cost 3 coins to switch to. | B tier: Convenient mount swaps and specialist access. Lower priority if one general-purpose mount already covers your needs. | Island 2 |
| DogCompanion1 coin dropped | Warns you which direction a Greed wave is coming from. | Listen to its barking and keep it away from live portals. It provides warning rather than fighting for you. Drop a coin on the fallen tree; recover the coin afterwards. | — | Island 2 |
| Building statueStatue3 gems9 coins | Increases wall durability. | Activate the blessing, then let builders reinforce your walls. It does not automatically upgrade the wall tier. | A tier: Stronger walls buy time on every defended side. Still maintain your army and repair damaged defences. | Island 3 |
| WarhorseMount2 gems8 coins | Gives nearby subjects a temporary protective buff. Ride past your soldiers to apply it. The horse still needs grass and stamina for its own escape. | Support SpeedSlow StaminaLow Grazes on open-field grass. Its protective ability does not prevent your mount from tiring. | B tier: Useful when you ride with vulnerable troops. Slow travel and low stamina make it a weaker everyday mount. | Island 3 |
| Draft horseMount1 gem3 coins | Gives you more running stamina than the starting horse. Useful for long scouting trips. It grazes on grass and has no combat ability. | Movement SpeedAbove average StaminaHigh Grazes on open-field grass. Long stamina does not remove its need to stop and recover. | A tier: High stamina makes long scouting trips easier. Bring it for travel; it has no combat or crowd-control skill. | Island 3 |
| Bakery HermitHermit4 gems1 coin | Converts a high-tier archer tower into a bakery that attracts and recruits vagrants. | Carry the hermit to a triplet-or-better tower, pay for conversion and stock treats. A vagrant who eats one joins you; recruiting them before eating saves the treat. | S tier: A high recruitment priority on long islands: fewer trips to distant camps and faster recovery after losses. Keep bread stocked. | Island 3 |
| Iron mineTechnology20 coins | Unlocks iron technology, including the route to the strongest keep and the bomb. | Unlock stone first. Pay at the mine, upgrade your local keep, then prepare the bomb and its escort. | — | Island 4 |
| BearMount3 gems8 coins | Damages wildlife and Greed with its charge attack. Run into targets to attack. Wildlife hits restore some stamina after the 2024 buff; keep enough reserve to retreat. | Damage DealerEconomy SpeedFast in forest StaminaLow Grazes on open-field grass. Hitting wildlife also restores some stamina; an empty route provides no targets for that recovery. | B tier: A useful hunting and damage specialist after the 2024 buff: wildlife hits restore some stamina. Low reserves still punish an empty escape route. | Island 4 |
| LizardMount3 gems10 coins | Creates fire on the ground that burns passing Greed. Use the mount action ahead of a wave, then leave enough stamina to retreat. | Damage DealerBlocker SpeedAbove average StaminaVery low Sunbathes while stopped on open ground; grass is unnecessary. Works during winter daylight too, most reliably near noon. Cannot sunbathe at night, in forest, inside caves or during a retaliation eclipse. | A tier: Strong damage and area denial against ground waves. Very low stamina and daylight feeding make long escapes risky. | Island 4 |
| Warrior HermitHermit2 gems1 coin | Converts a triplet archer tower into a recruitment point for one additional squad leader. | Carry the hermit to the tower and pay for conversion, then buy its extra shield. The new leader needs archers for a useful assault squad. | B tier: Useful extra assault capacity once you can equip another squad. Conversion, shields and archers make it an investment. | Island 4 |
| Knight statueStatue2 gems8 coins | Improves knights’ attack speed and coin capacity. | Activate the statue before relying on it in an assault; it does not recruit a squad for you. | A tier: Faster attacks and extra coin capacity strengthen assault squads. The old leaping attack was removed in 2021; you still need trained troops. | Island 5 |
| KirinMount4 gems12 coins | Produces coins after grazing, like the medieval Unicorn. Let it graze to support your income; coin production has its own cooldown. | Economy SpeedFast on plains StaminaAverage Grazes on open-field grass. This Shogun variant shares the Unicorn’s recovery needs; winter limits grazing and coin income. | B tier: Useful grazing income, like the Unicorn. Winter and the lack of a defensive skill limit its everyday value. | Island 5 |
| Horn HermitHermit3 gems1 coin | Adds a war horn to a strong wall, allowing reinforcements from the other side. | Carry the hermit to a suitable high-tier wall and pay for conversion. Sounding the horn costs 1 coin; troops from the other side stay until morning, leaving that side less protected. | C tier: Situational reinforcements for a threatened side. Travel takes time and the opposite side loses protection. | Island 5 |
No unlocks match. Try another island, type, tier or search.
Island 1: No gem chests here. Bring gems back from island 2.
Island 2: First technology upgrade. Free the dog before you leave.
Island 3: The merchant no longer appears from this island onward.
Island 4: Unlock iron, then upgrade your local keep for the bomb.
Island 5: No coin chests. Bring enough money for your purchases.
Island 5: The Kirin produces coins after grazing. It is an economy mount rather than a replacement for prepared defences, and winter limits access to its normal grazing. Its landmark is a flowering tree. The appearance changes from the medieval Unicorn, but its island and unlock payments do not.
Starting portal counts
Count the two end portals separately from the small forest portals. These are exterior starting totals, before any destruction, and exclude cave nests and player-built teleporters. Exact positions can be mirrored or spread differently along your island.
Island 1
2portals totalIsland 2
4portals totalIsland 3
6portals totalIsland 4
8portals totalIsland 5
8portals totalCampaign route and rescuing a hermit
Get stone technology on island 2 and iron on island 4. Bring gems back to island 1 if you want its statue, mount or hermit before pressing further. Once you have an iron keep, prepare the bomb assault: 18 coins for the bomb, 5 to enter the cave and 5 to light it. Clear the cliff-side forest portals first and leave enough stamina for the escape.
A captured hermit is tied to the island where the kidnapping happened. Blowing up that cave can rescue the hermit, along with a stolen dog or gems held there. We learned that the angry way in co-op: one careless trip cost us a hermit, and the next objective was getting them back. The setback changes your plans; it does not mean the whole campaign is ruined.
Sources
Checked 20 October 2026. Official announcements establish campaign features; detailed routes and counts use the named community references. These are researched instructions, not a claim that we tested every route.
- Official Shogun overview
- Shogun setting differences
- Ninja recruitment and behaviour
- Five-island unlocks and portals
- Kirin and Unicorn unlock
- Bomb assault
- Hermit rescue
- Mount unlock and ride costs
- Hermit unlock and carrying costs
- Statue unlock and activation costs
- Stone / birch technology costs
- Iron / pine technology costs
- Dog rescue payment
- Hermit building conversions
- Mount abilities
- Stables and Norse ranchers
- Bakery, potion, mead and wine recruitment
- Additional squad leader from the Warrior Hermit
- Horn-wall reinforcements
Mount travel and feeding checked 23 October 2026 against the community-maintained Kingdom Wiki mount comparison, Lizard sunbathing conditions, wolf howling and Unicorn / Kirin reference. These are researched comparisons, not our own timed mount tests.